Simple Ajax Contact Form Using jQuery & PHP
In this tutorial, we will be creating a simple Ajax-based Contact form using jQuery and PHP. Why Ajax? because your visitors don’t have to reload the page in order to send you email, they can simply click send button and the email gets sent instantly before their eyes, so it’s just fantastic, no more page reloads! The tutorial is pretty basic, you should be able to pull it off if you are a bit familiar with HTML, PHP, and jQuery. Have a look at the picture below, this is how our contact form going to look at the end. We will have input fields as shown below, you can later add-remove other fields as per requirements of your HTML form.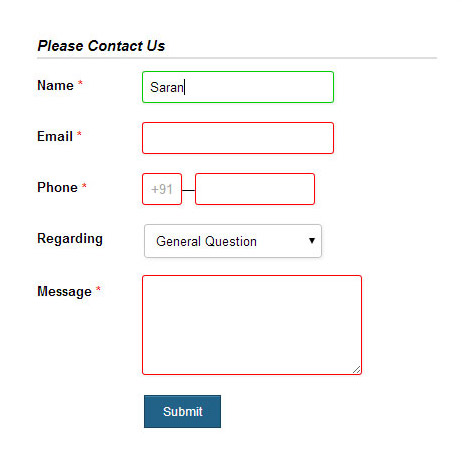
Mark UP
Let’s start coding our contact page, we start by adding an HTML form tag and some input fields, you can review the code below. A normal contact page should contain name, email, phone and message fields, you may add other fields as you like, such as check-boxes, radio buttons, select-boxes as per your requirements for the contact form.HTML
12345678910111213141516171819202122232425262728293031
<div class="form-style">
<div class="form-style-heading">Please Contact Us</div>
<div id="contact_results"></div>
<div id="contact_body">
<form action="contact_me.php" method="post" id="my_form" novalidate>
<label><span>Name <span class="required">*</span></span>
<input type="text" name="user_name" required class="input-field"/>
</label>
<label><span>Email <span class="required">*</span></span>
<input type="email" name="user_email" required class="input-field"/>
</label>
<label><span>Phone</span>
<input type="text" name="country_code" maxlength="4" placeholder="+91" required class="tel-number-field"/>—<input type="text" name="phone_number" maxlength="15" class="tel-number-field long" required/>
</label>
<label for="subject"><span>Regarding</span>
<select name="subject" class="select-field" required>
<option value="">---- Select ----</option>
<option value="General Question">General Question</option>
<option value="Advertise">Advertisement</option>
<option value="Partnership">Partnership Oppertunity</option>
</select>
</label>
<label for="field5"><span>Message <span class="required">*</span></span>
<textarea name="message" id="message" class="textarea-field" required></textarea>
</label>
<label>
<span> </span><input type="submit" id="submit_btn" value="Submit" />
</label>
</form>
</div>
</div>Form Style
You can style your HTML form with CSS, you can either create a separate CSS or include the code within the <head></head> section of your HTML document. I personally use DevTool in chrome browser and Firebug in Firefox browser, these tools allow me to edit, debug, and monitor CSS, HTML and JavaScript in realtime. If you haven’t used these tools before, you should definitely learn to use them, they are lifesavers. For this example, I’ve borrowed a HTML contact form layout from my other post here, which is included in downloadable file below, you can just download and play with form style using HTML editor until you are satisfied with the contact form look.jQuery Ajax
Now it’s time to write some jQuery code for the contact page. Before we start, make sure to included jQuery library within the <HEAD> section of your HTML document Or just before </body> tag, without this library jQuery code doesn’t work. Right after the jQuery library script, we can start writing our jQuery code for the contact form. Let’s start by opening <scrip> tag. You can see the code below:JQUERY
1234567891011121314151617181920212223242526272829303132333435363738394041424344454647484950515253545556
<!-- include Google hosted jQuery Library -->
<script src="//ajax.googleapis.com/ajax/libs/jquery/1.11.1/jquery.min.js"></script>

<!-- Start jQuery code -->
<script type="text/javascript">
$("#my_form").submit(function(event){
	event.preventDefault(); //prevent default action
	var proceed = true;
	var form = this;

	//simple validation at client's end
	//loop through each field and we simply change border color to red for invalid fields
	$(form).find(':required').each(function(){
		$(this).css('border-color','');
		if(!$.trim($(this).val())){ //if this field is empty
			$(this).css('border-color','red'); //change border color to red
			proceed = false; //set do not proceed flag
		}
		//check invalid email
		var email_reg = /^([\w-\.]+@([\w-]+\.)+[\w-]{2,4})?$/;
		if($(this).attr("type")=="email" && !email_reg.test($.trim($(this).val()))){
			$(this).css('border-color','red'); //change border color to red
			proceed = false; //set do not proceed flag
		}

	}).keyup(function() { //reset previously set border colors on .keyup()
		$(this).css('border-color','');
	}).change(function() {  //for select box
		$(this).css('border-color','');
	});

	if(proceed){ //everything looks good! proceed...
		//get input field values data to be sent to server
		var post_url = $(this).attr("action"); //get form action url
		var request_method = $(this).attr("method"); //get form GET/POST method
		var form_data = $(this).serialize(); //Encode form elements for submission

		//Ajax post data to server
		$.ajax({
			url : post_url,
			type: request_method,
			dataType : 'json',
			data : form_data
		})
		.done(function(response){
			if(response.type == 'error'){ //load json data from server and output message
				output = '<div class="error">'+response.text+'</div>';
			}else{
				$(form)[0].reset(); //reset this form upon success
				output = '<div class="success">'+response.text+'</div>';
			}
			$("#contact_form #contact_results").html(output);
		});
	}
});
</script>PHP Email
Below is our PHP code for the (contact_me.php), the file is needed to send email to the recipient, as well as respond back to user in the event of success or failure. It receives POST data from the contact page, its good idea to sanitize the data using PHP filter_var().PHP
1234567891011121314151617181920212223242526272829303132333435363738394041424344454647484950515253545556575859606162636465666768697071
<?php
if($_POST)
{
	$to_email   	= "[email protected]"; //Recipient email, Replace with own email here
	$from_email     = 'noreply@your_domain.com'; //from mail, it is mandatory with some hosts and without it mail might endup in spam.

	//check if its an ajax request, exit if not
    if(!isset($_SERVER['HTTP_X_REQUESTED_WITH']) AND strtolower($_SERVER['HTTP_X_REQUESTED_WITH']) != 'xmlhttprequest') {

		$output = json_encode(array( //create JSON data
			'type'=>'error',
			'text' => 'Sorry Request must be Ajax POST'
		));
		die($output); //exit script outputting json data
    }

	//Sanitize input data using PHP filter_var().
	$user_name		= filter_var($_POST["user_name"], FILTER_SANITIZE_STRING);
	$user_email		= filter_var($_POST["user_email"], FILTER_SANITIZE_EMAIL);
	$country_code	= filter_var($_POST["country_code"], FILTER_SANITIZE_NUMBER_INT);
	$phone_number	= filter_var($_POST["phone_number"], FILTER_SANITIZE_NUMBER_INT);
	$subject		= filter_var($_POST["subject"], FILTER_SANITIZE_STRING);
	$message		= filter_var($_POST["msg"], FILTER_SANITIZE_STRING);

	//additional php validation
	if(strlen($user_name)<4){ // If length is less than 4 it will output JSON error.
		$output = json_encode(array('type'=>'error', 'text' => 'Name is too short or empty!'));
		die($output);
	}
	if(!filter_var($user_email, FILTER_VALIDATE_EMAIL)){ //email validation
		$output = json_encode(array('type'=>'error', 'text' => 'Please enter a valid email!'));
		die($output);
	}
	if(!filter_var($country_code, FILTER_VALIDATE_INT)){ //check for valid numbers in country code field
		$output = json_encode(array('type'=>'error', 'text' => 'Enter only digits in country code'));
		die($output);
	}
	if(!filter_var($phone_number, FILTER_SANITIZE_NUMBER_FLOAT)){ //check for valid numbers in phone number field
		$output = json_encode(array('type'=>'error', 'text' => 'Enter only digits in phone number'));
		die($output);
	}
	if(strlen($subject)<3){ //check emtpy subject
		$output = json_encode(array('type'=>'error', 'text' => 'Subject is required'));
		die($output);
	}
	if(strlen($message)<3){ //check emtpy message
		$output = json_encode(array('type'=>'error', 'text' => 'Too short message! Please enter something.'));
		die($output);
	}

	//email body
	$message_body = $message."\r\n\r\n-".$user_name."\r\nEmail : ".$user_email."\r\nPhone Number : (".$country_code.") ". $phone_number ;

	//proceed with PHP email.
	$headers = 'From: '. $from_email .'' . "\r\n" .
	'Reply-To: '.$user_email.'' . "\r\n" .
	'X-Mailer: PHP/' . phpversion();

	$send_mail = mail($to_email, $subject, $message_body, $headers);

	if(!$send_mail)
	{
		//If mail couldn't be sent output error. Check your PHP email configuration (if it ever happens)
		$output = json_encode(array('type'=>'error', 'text' => 'Could not send mail! Please check your PHP mail configuration.'));
		die($output);
	}else{
		$output = json_encode(array('type'=>'message', 'text' => 'Hi '.$user_name .' Thank you for your email'));
		die($output);
	}
}
?>